Cloning Fig Cuttings Using the Fig-Pop Method

Let’s assume that your cuttings have been prepped (washed and cleaned) and you’re ready to start the rooting process. You will need the following:
- The cuttings.
- Rooting medium. I use a combination of the following:
- Coco coir.
- Peat Moss.
- Perlite, optional.
- Tap water.
- Plastic bags.
- Rubber bands
- Mat knife.
- Pruner.
- Paper towels
- Awl.
- A pen or a pencil.
I don’t have a preferred rooting medium, but I use either coco coir, peat moss, or a combination of both. One year, in a moment of weakness, I added 50% of potting soil in the rooting medium, and that was a terrible mistake because quite a few of my cuttings did not make it. Lesson learned, and it will never happen again.
Coco coir comes compressed, and it needs to be hydrated. Coco coir is a sustainable, earth-friendly growing medium and soil amendment made from processed coconut husks. The major difference between peat moss and coco coir, other than the price, is that peat moss can be used immediately after opening the bag that it was sold in, whereas coco coir needs to be hydrated, and this can take one hour or more. On the flip side, coco coir comes from coconuts, and it’s virtually limitless. Peat moss primarily comes from Canadian peatlands and as soon as it’s used or spent we will have to wait a couple of million years to get a new supply of it.

I use a plastic container to mix everything together. I add in the container: coco coir and/or peat moss and sometimes perlite (no more than 10%), followed by a small amount of tap water. I mix everything together, and I make sure the mixture is not too wet. To test for the wetness of the mixture, take a small amount of this mixture in your hand and squeeze it. You should not see any water drip out. If water drips out the mixture is too wet, add some additional dry medium to absorb the excess water. If the mixture is too wet it will probably cause the rooting of the cuttings to fail.

I have used Parafilm for many years, and I have a nifty YouTube video showing how to properly wrap a cutting with Parafilm. I’ve stopped using it because sometimes it causes an issue with mold. You need to be careful and keep the Parafilm away from the rooting medium AND if you have to water the fig-pop MAKE SURE WATER STAYS AWAY FROM THE PARAFILM.

I buy the plastic bags from the Arts and Crafts department at Walmart. Alson you can look into the supply area of figbid.com. There you can easily find all of the supplies you will need in one place. Easy peasy. I’ve created an account on FigBid.com, and when I decide to buy a cutting or two, I usually choose the ‘Buy It Now’ option rather than going through the bidding process.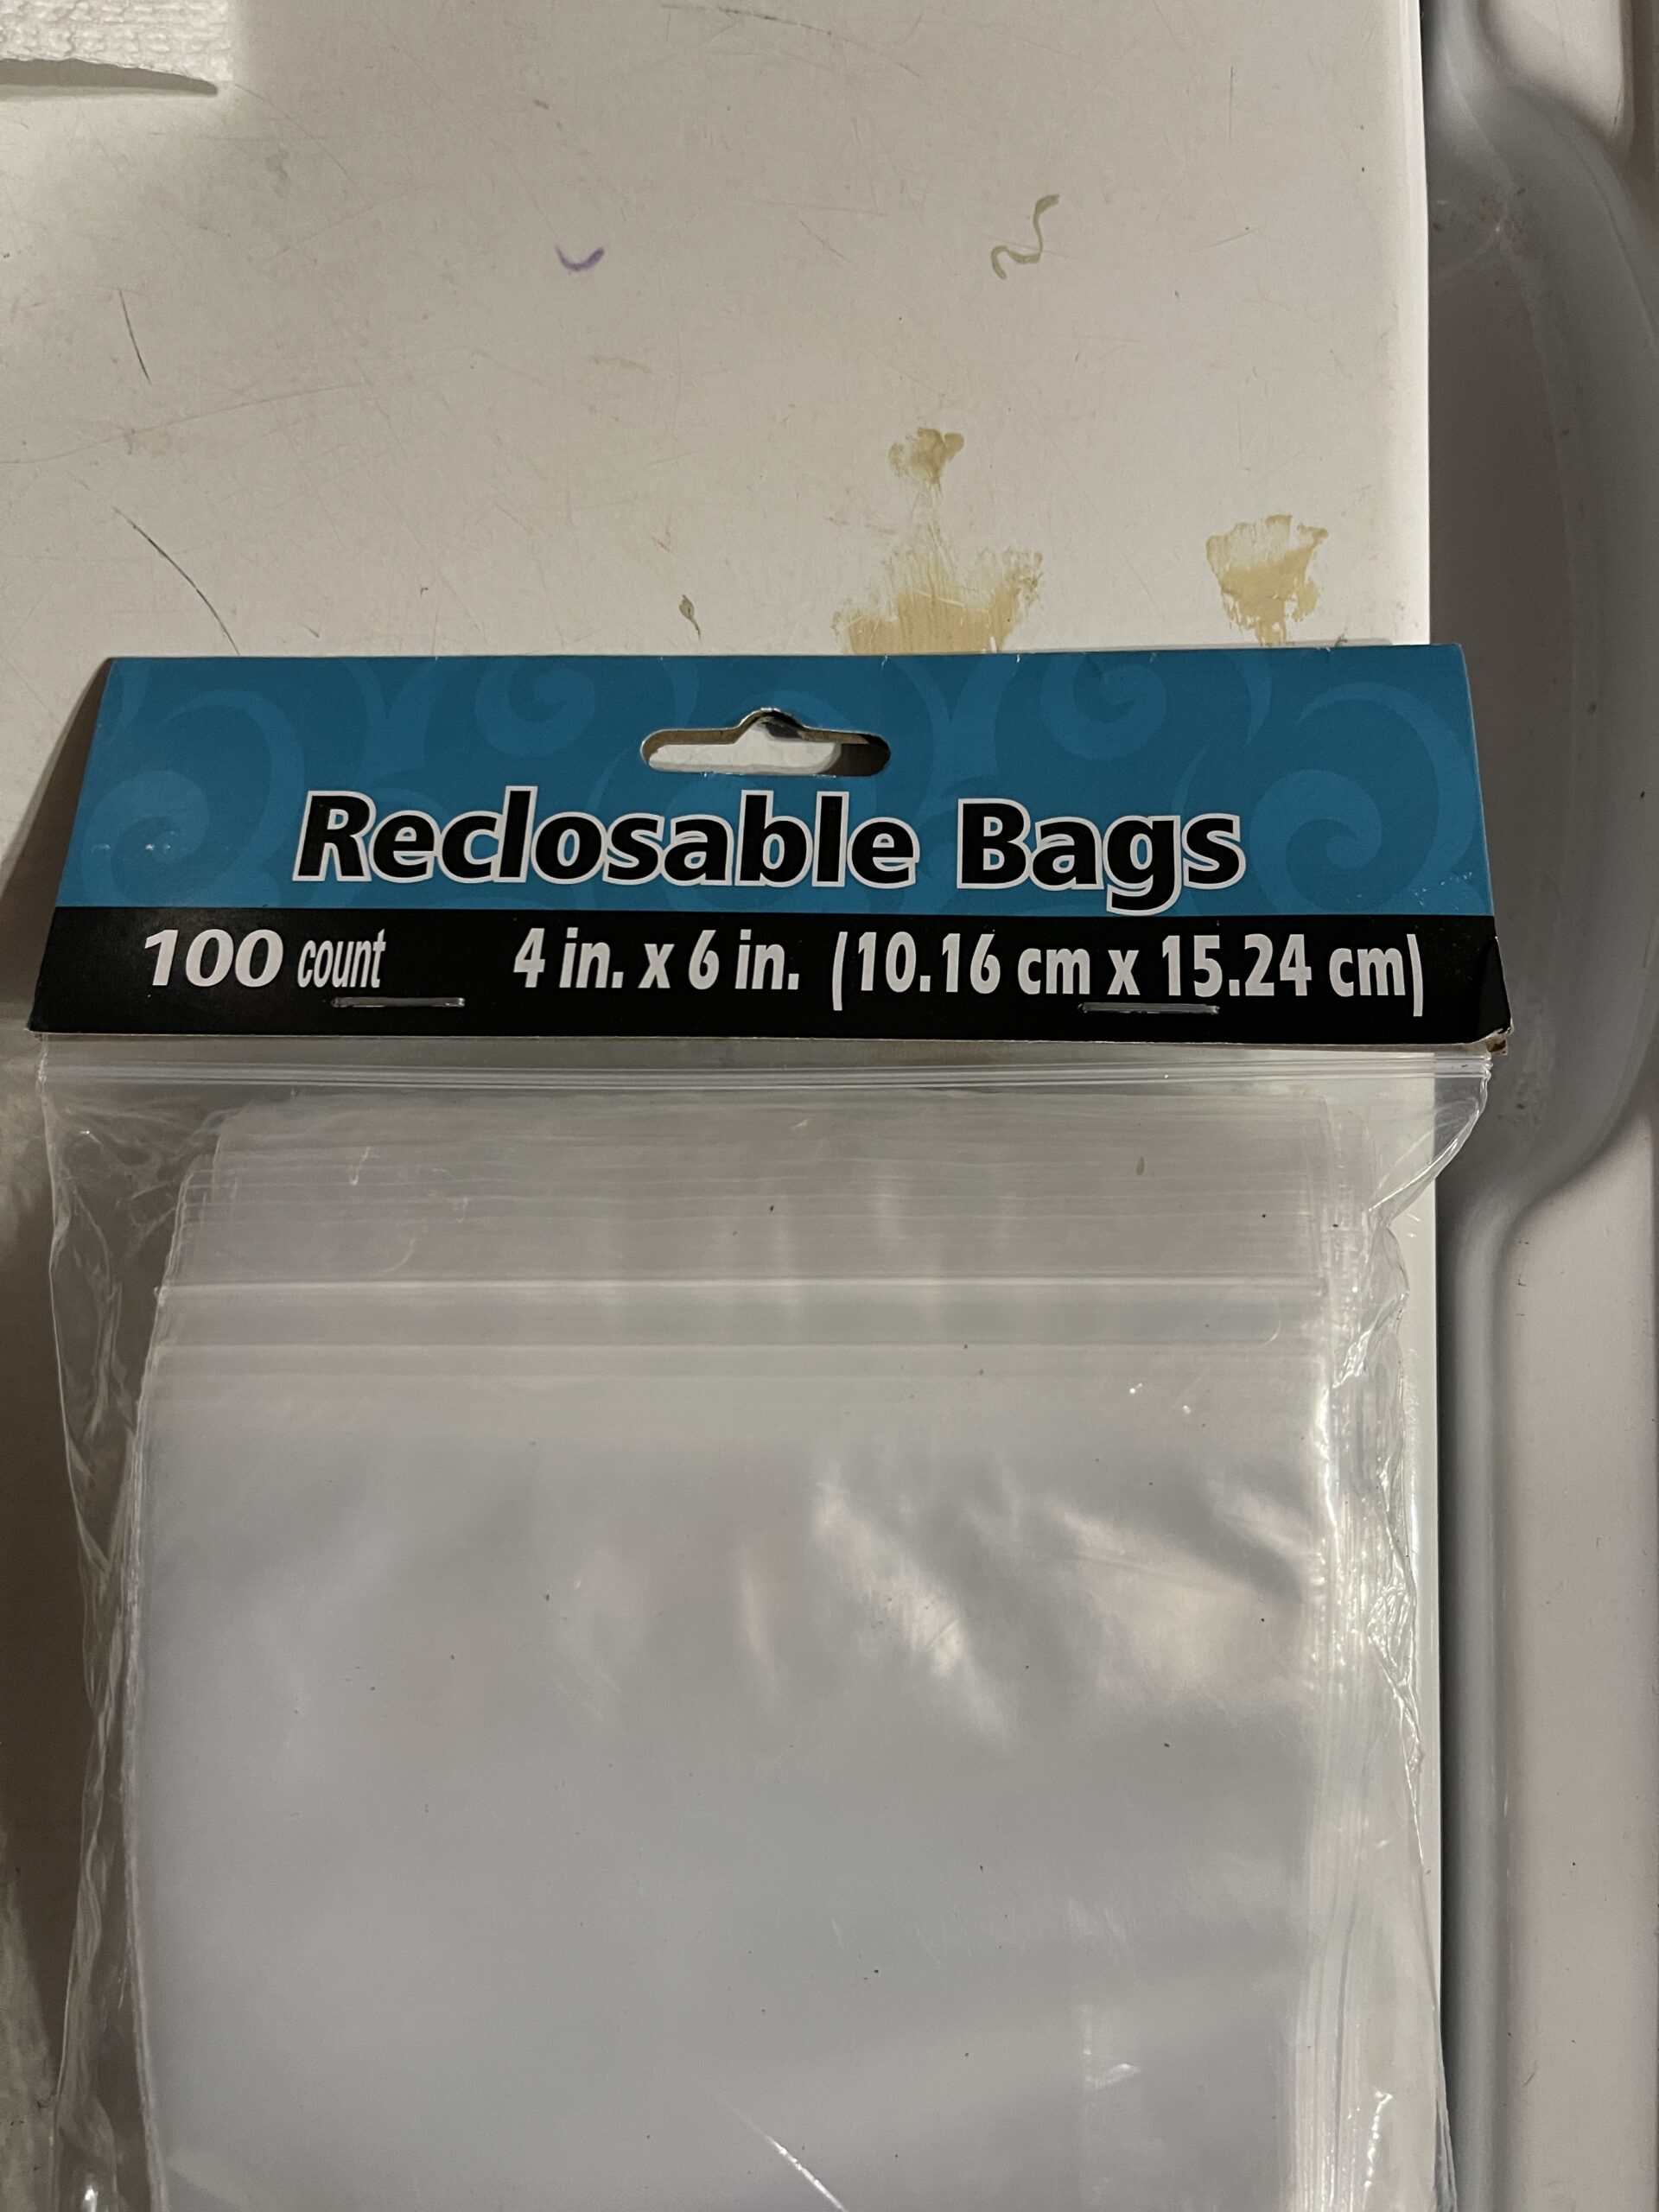


Reminder: We are trying to root cuttings first and grow foliage later.
Below, I am showing a cutting that has its terminal bud pruned. Terminal buds want to grow longer/taller and produce foliage (leaves), but that’s not the goal here. Also, I always prune a small piece from the bottom of the cutting near where a node is, and if there is a terminal bud, I sacrifice it. The angle of the cut is inconsequential. 
Important: Make sure you mark each bag with the fig variety you are rooting. For this, use a permanent marker, write the variety on a sticker, and adhere the sticker to the bag BEFORE adding any medium.
A fig node is where a future leaf, branch, or fig will grow, and a cutting may have several of them. Nodes that are well below the rooting medium should be sacrificed with a mat knife or razor blade.
Use a mat knife to score the bottom of a fig cutting. Scoring the bottom of a fig cutting helps to encourage root development by creating a small wound on the cutting. This injury stimulates the plant to produce callus tissue, which can help promote rooting. The process also improves the cutting’s ability to take up water and nutrients, leading to healthier root growth. Additionally, scoring can help break through any barriers that might hinder the rooting process, such as a thick or woody base, allowing the cutting to establish roots more effectively. It’s a simple step that can increase the chances of successful propagation.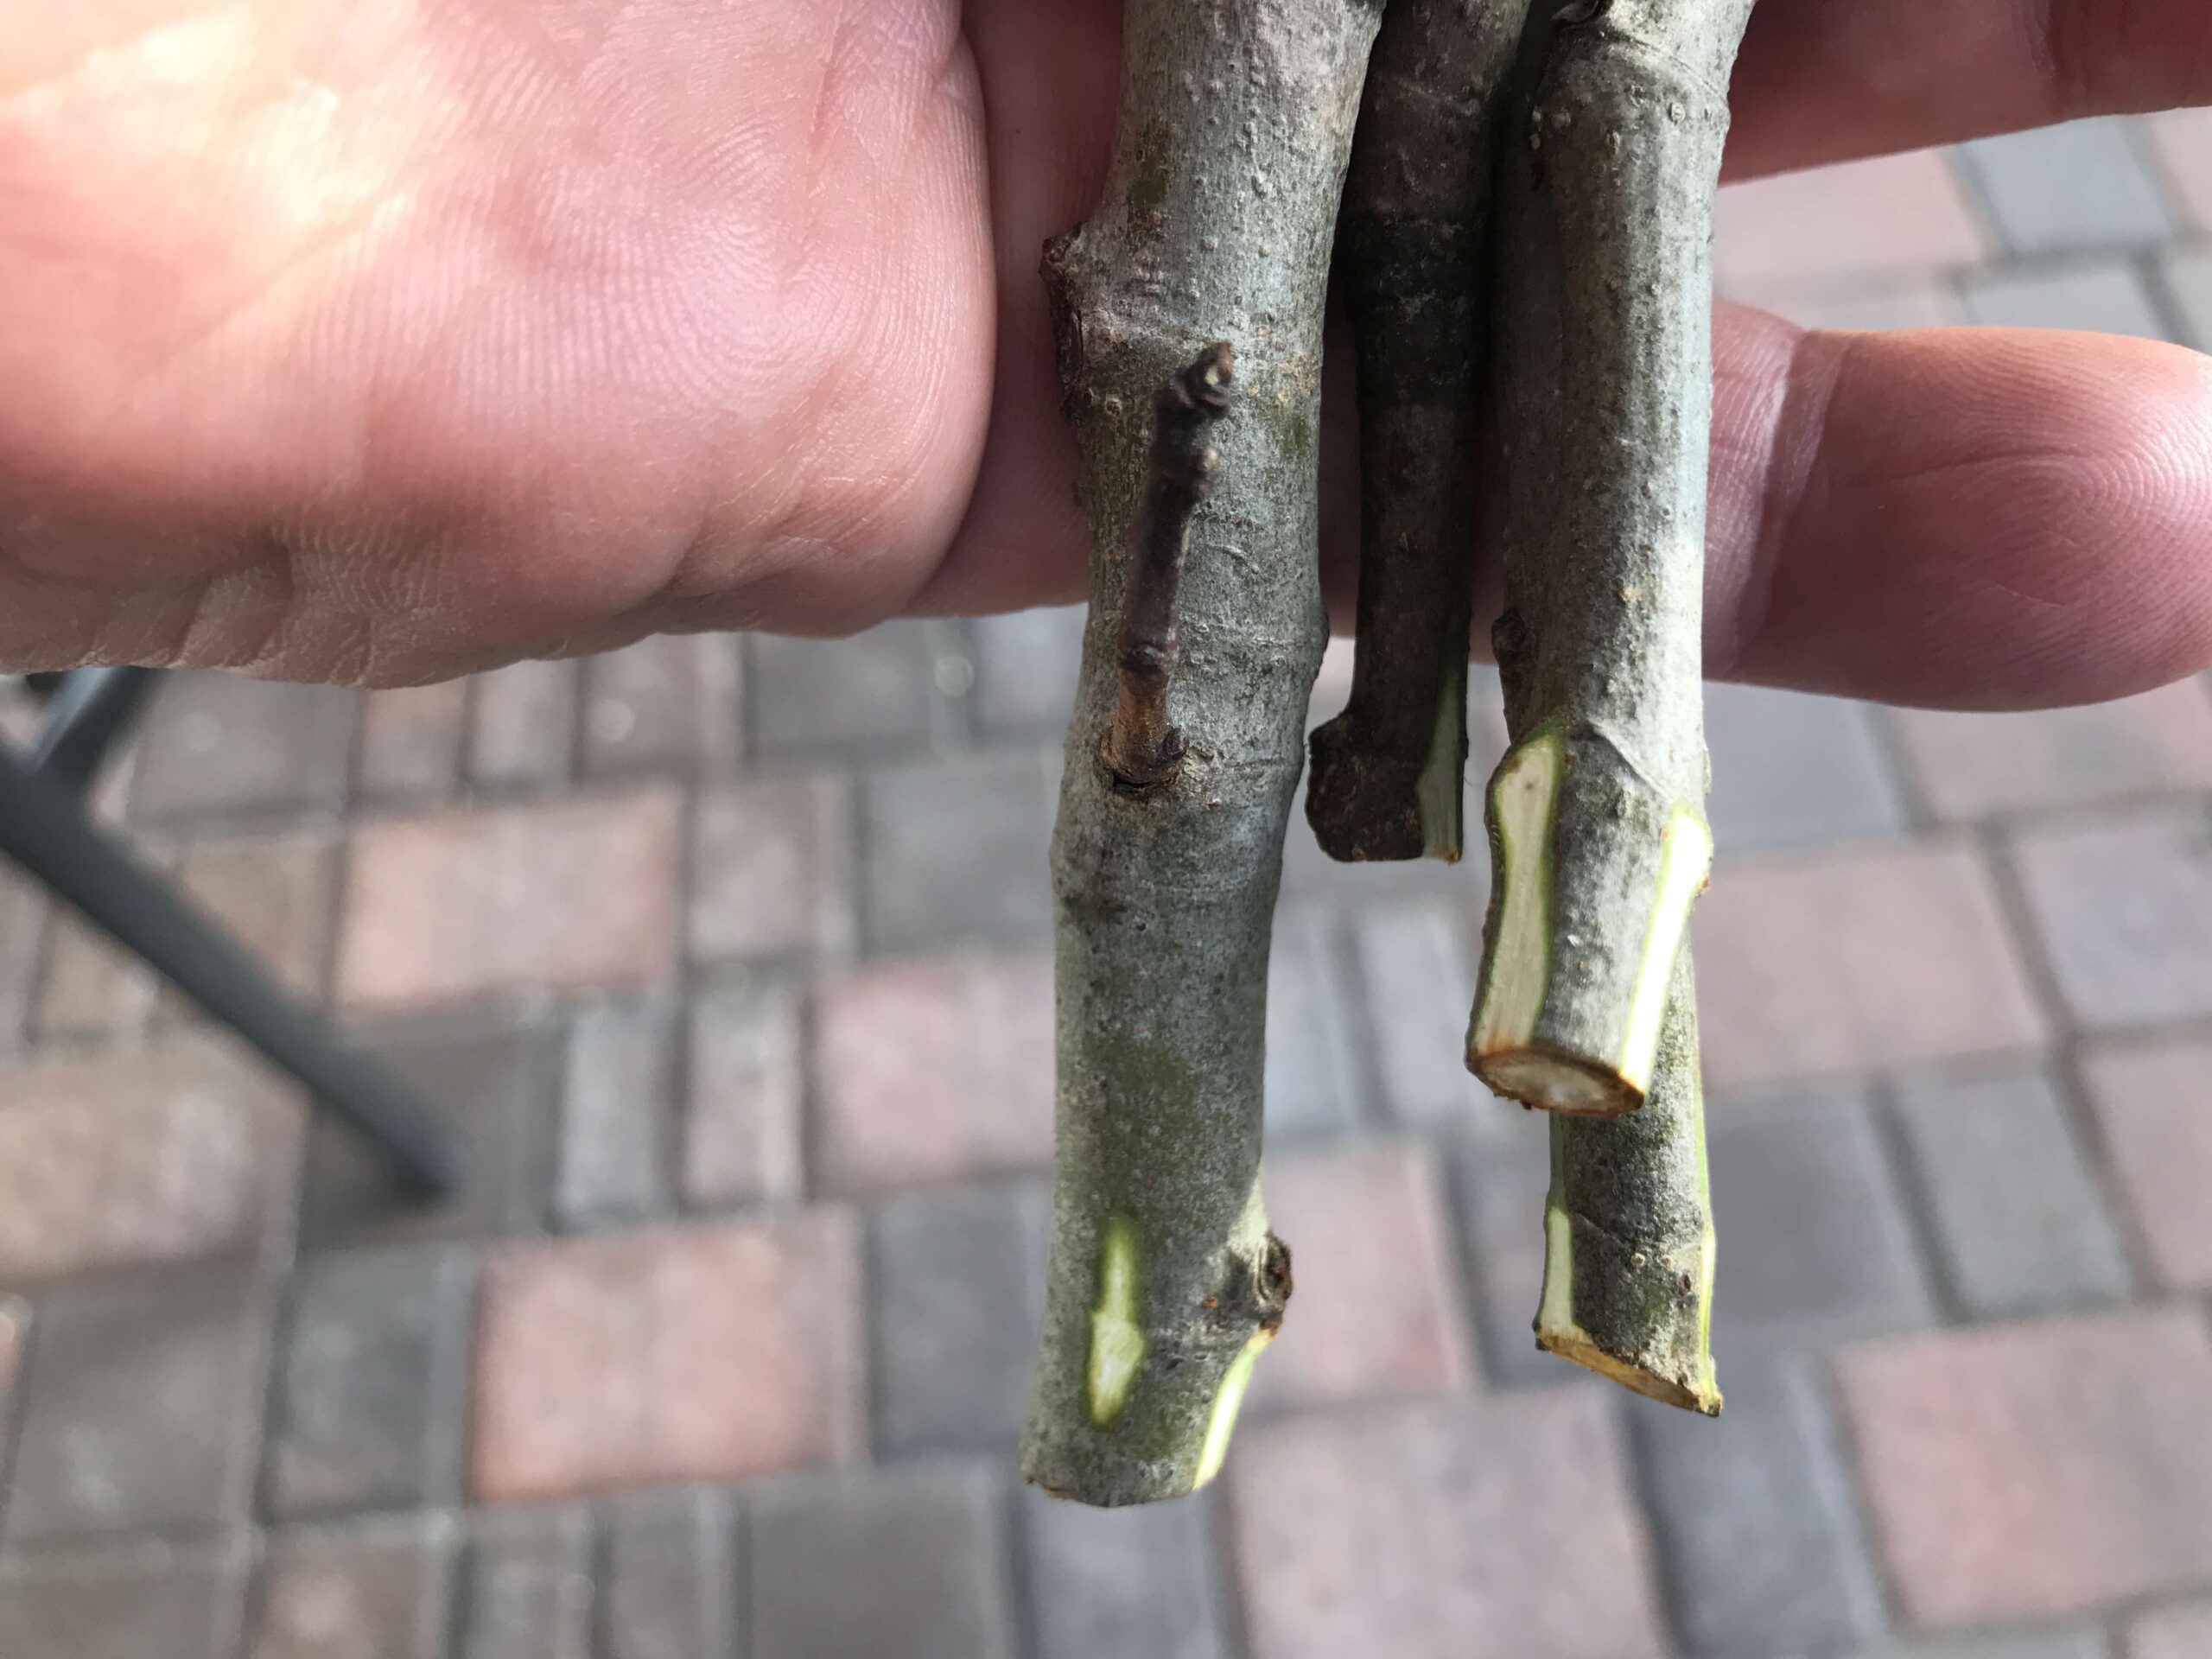
Start by filling the bag with the prepared medium. Use the pen/pencil to dig a hole in the middle of the medium to make the insertion of the cutting effortless. 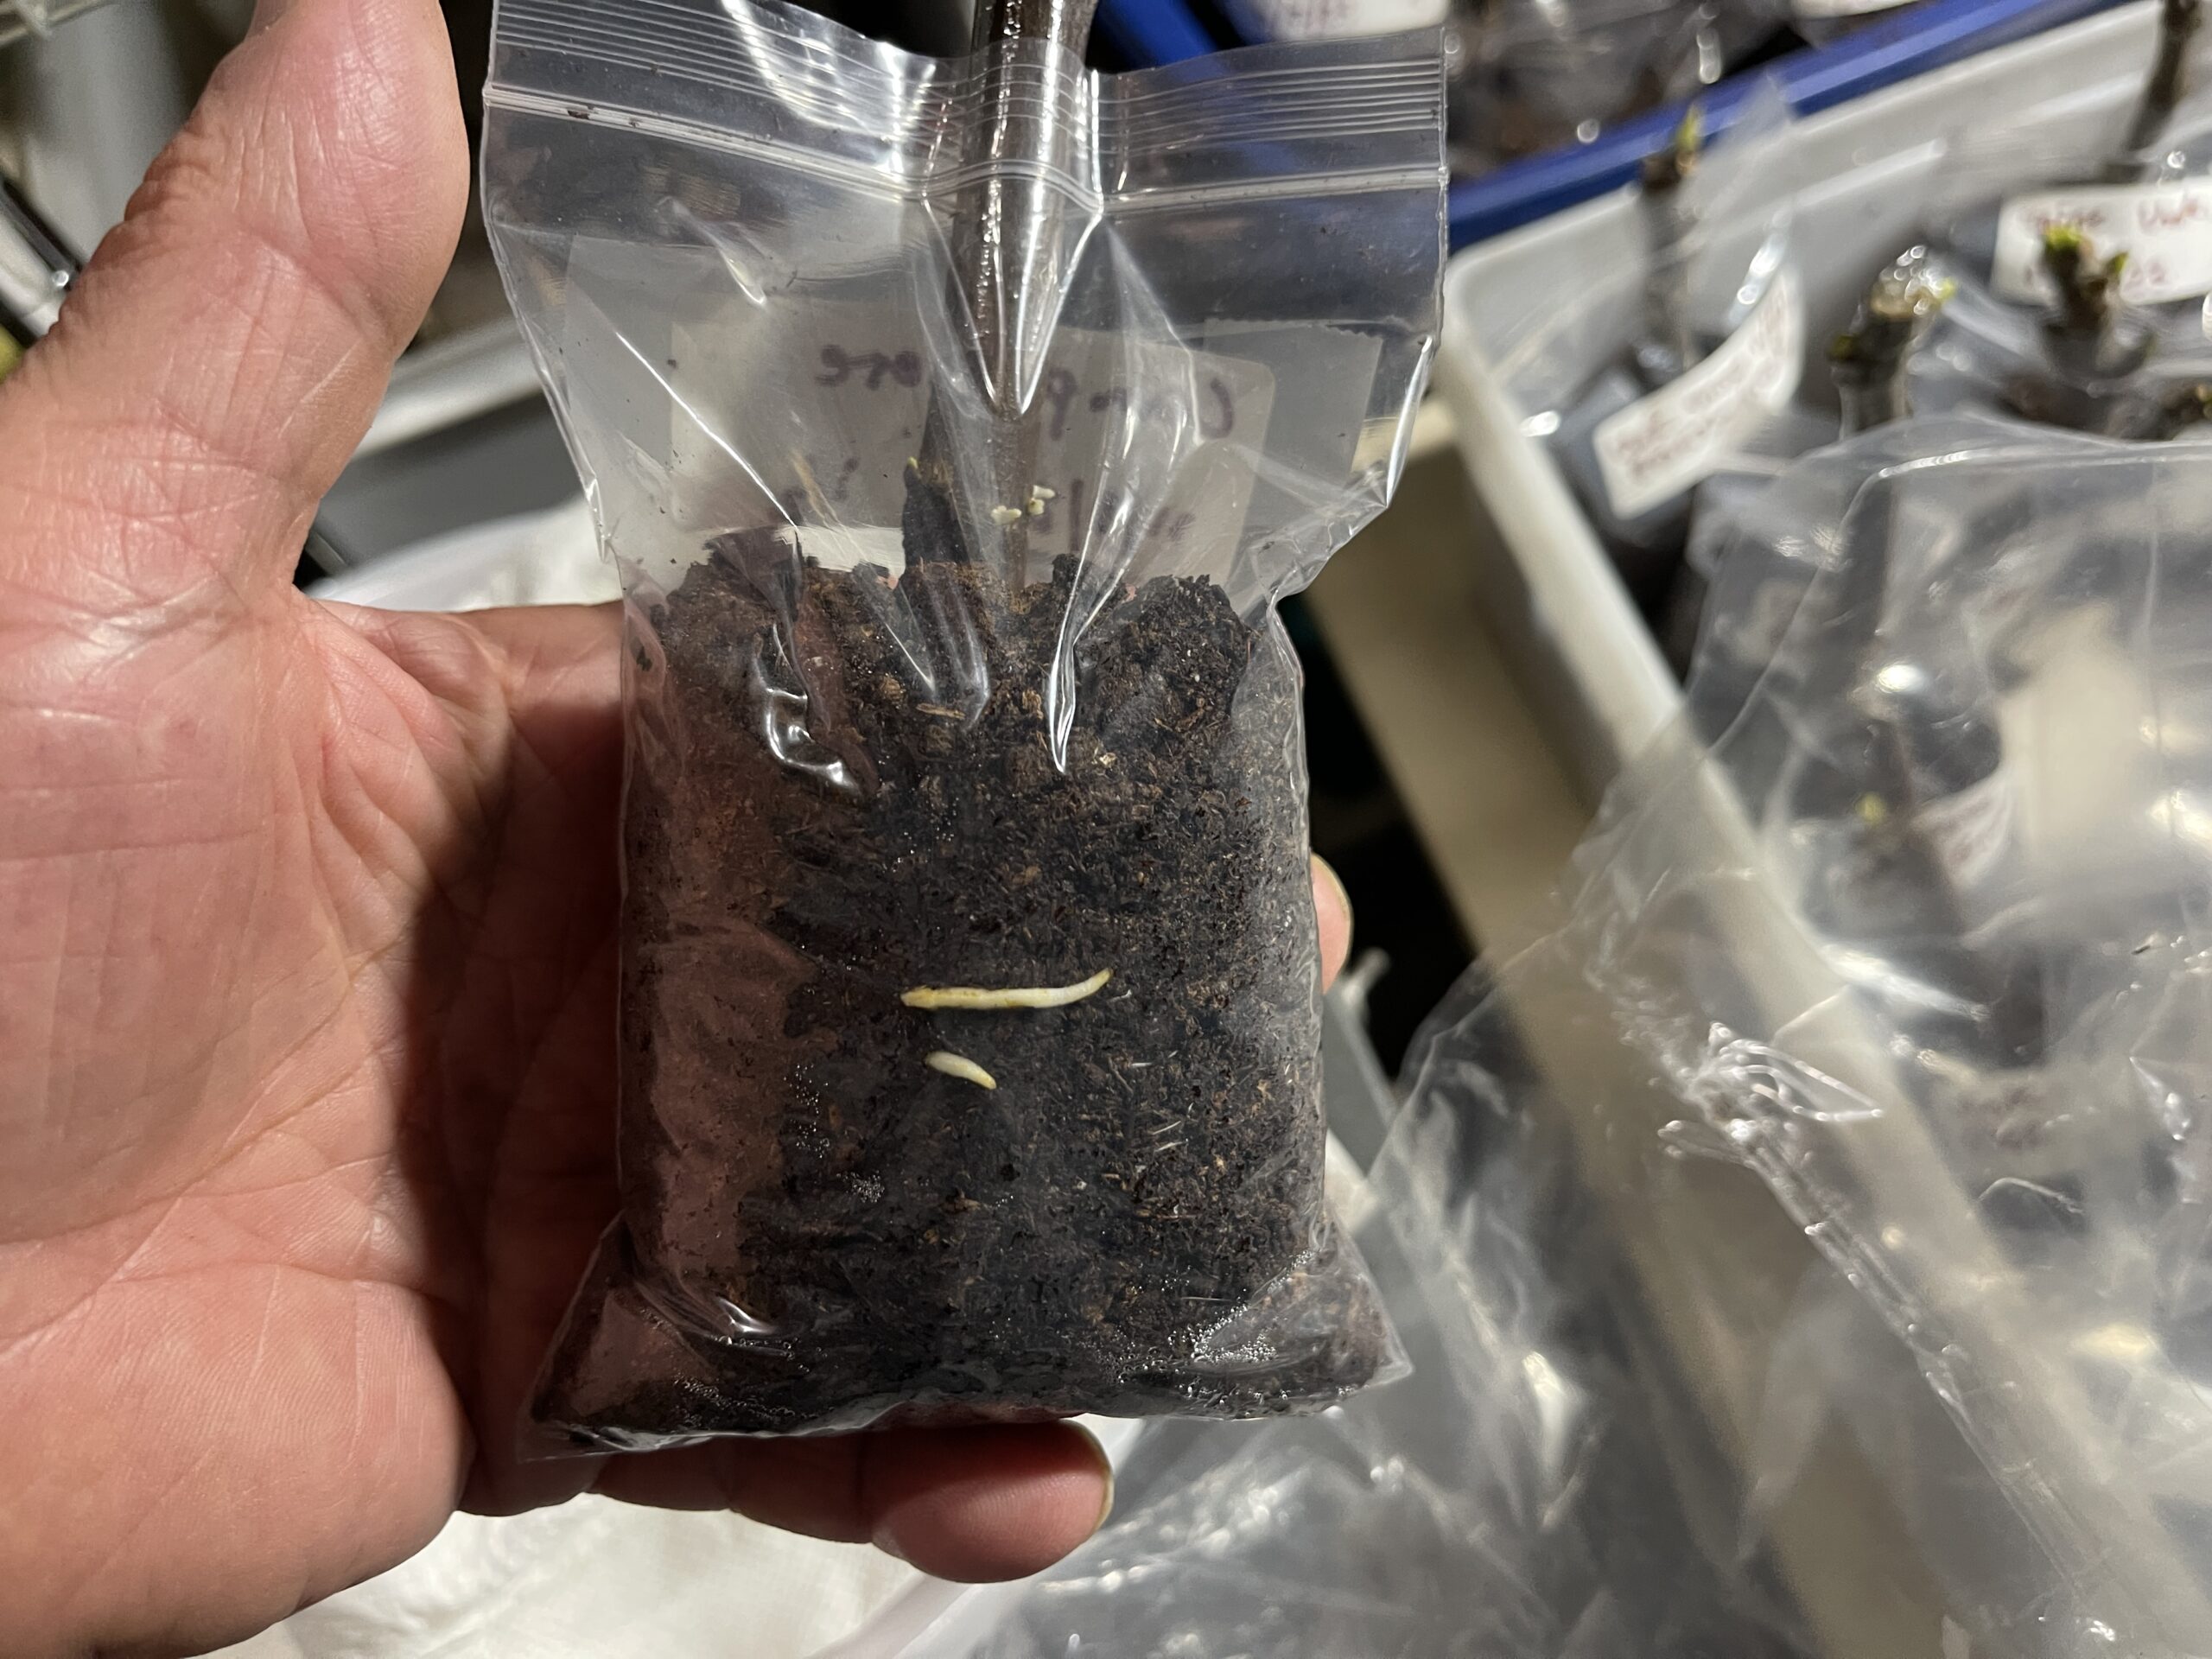
Push the cutting in the hole you just created and use your fingers to push and compress the medium around the cutting.
Important: Make sure the medium is not loose and the cutting is set inside the bag nice and snug.
The medium in the bag should be compressed, but don’t exert too much force. Finally, use a rubber band to keep the whole bag with the cutting snug and secure.
Store the bags in total darkness, and there is no requirement for sun or any kind of artificial light. It will help if you keep the bags in a warm place and away from drafts. This is a major advantage to rooting fig cuttings with this method because you can root lots of cuttings in little space. Using cups or small pots requires a lot more space.
That’s it!
It takes about three to four weeks for a cutting to show its newly developed roots, and you should start checking for roots after the third week. Celebratory gunfire and singing patriotic songs are required. This means that you should not check the bags every day for roots; set them aside and forget about them for three weeks. Once the roots begin to grow, you should start giving the cutting a little water.
To water my cuttings I bought a set of syringes online. They have a wide tip that makes watering the cuttings easier. First, I use an awl to poke two holes at about the middle of the bag, and I use that hole to push water into the bag using the syringe tip.
Do not flood the bag with water! Less water is better. After awhile, you will know if the bag needs to be watered by its weight. 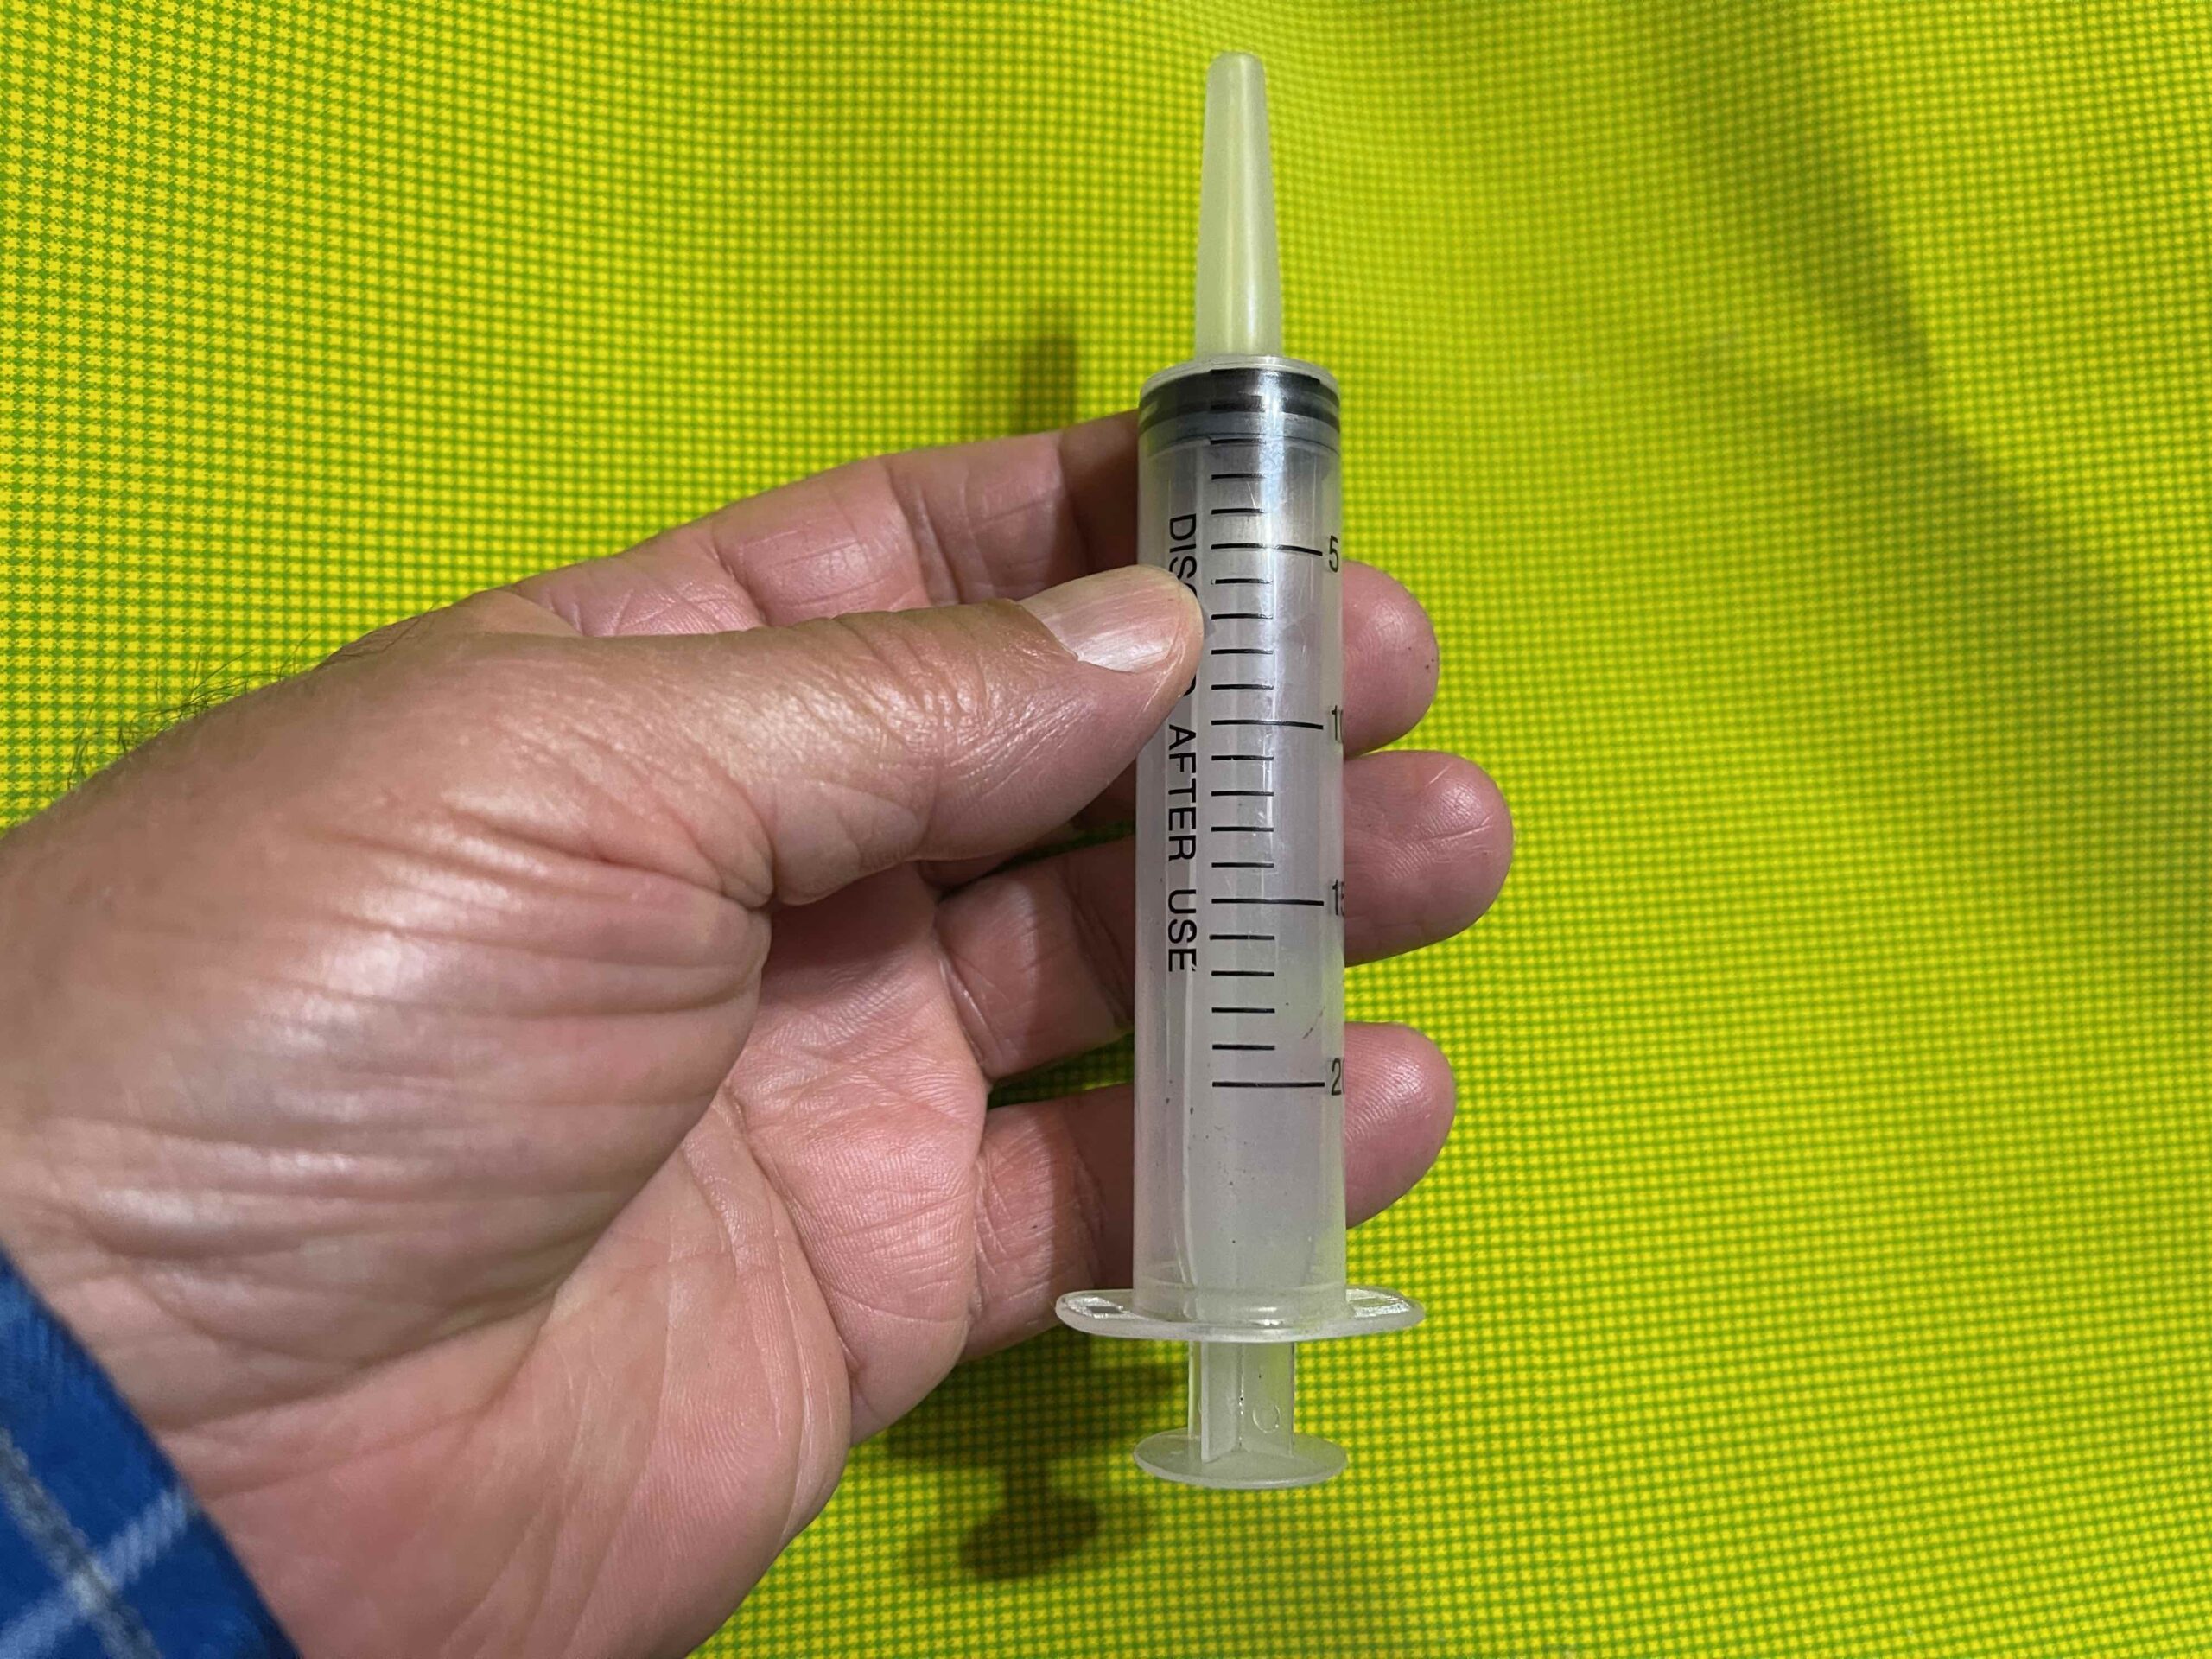
The rooting medium used, either peat moss or coco coir, doesn’t contain sufficient nutrients for the cuttings to grow. I created a great YouTube video that demonstrates the up-potting process.
I root about 200 cuttings every year, and timing is very important to me. If you root a few cuttings, you may start the process any time, but I must adhere to a schedule so I can have healthy fig trees by the middle of April. For this reason, I created a YouTube video that shows how to figure out when to purchase and when to start the rooting process.
Happy rooting!