Every year, I root anywhere from 200 to 600 fig cuttings, and I must confess—no matter how careful I am, at least one of them ends up rooted upside down. Once a cutting starts growing that way, it becomes very tricky to fix. Can it be corrected? The answer is YES! However, in most cases, I simply toss it into the compost bin and move on. Still, it’s worth knowing how to correctly identify the top and bottom of a fig cutting so you don’t run into this problem.
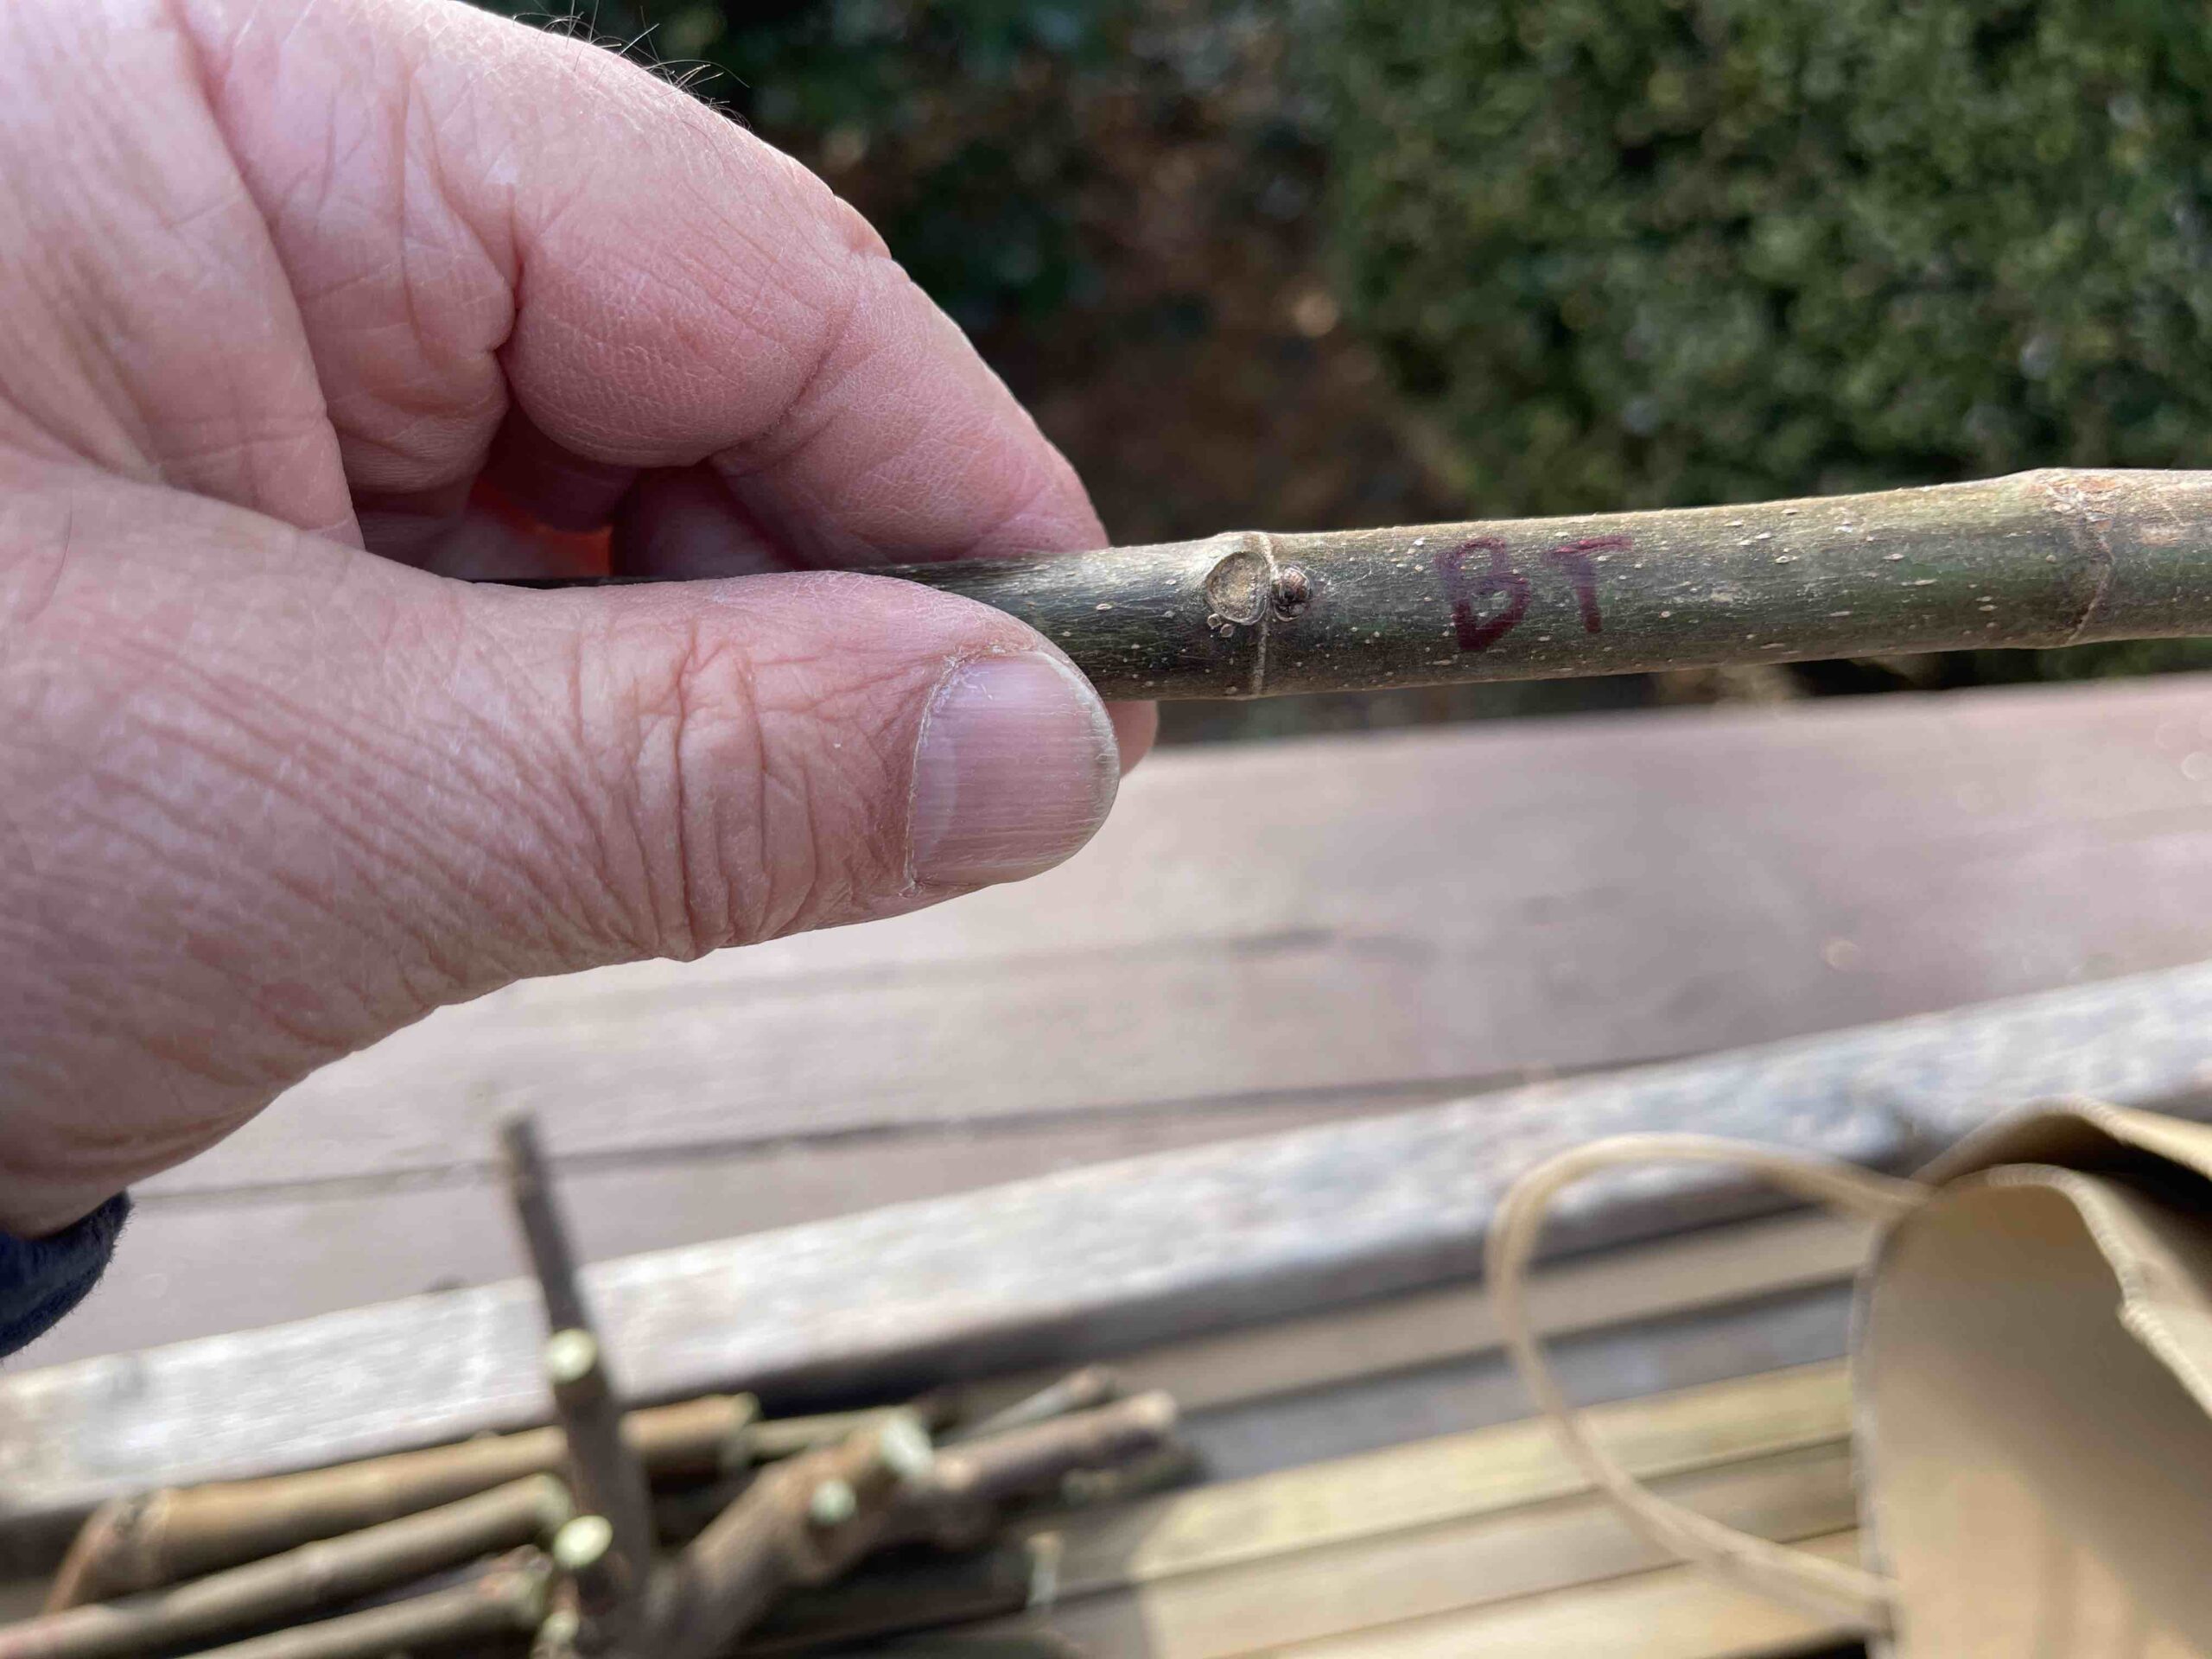
The two images below illustrate what to look for. Each node has two distinct features: a large “eye” and a tiny bump just above it. The large eye is where a leaf once grew, and the tiny bump is the bud that can develop into a future branch, leaf, or even a fig.
Here’s the key to proper orientation:
You want the tiny bump (the bud) facing upward, with the larger eye directly beneath it. That’s how you know which end should be up.


To make things easier, I always write the fig variety name directly on the cutting. If you hold the cutting so you can read the name normally, you’re holding it correctly—the beginning of the name is at the bottom, and the end of the name points toward the top.
I hope this little tip saves you from rooting upside-down cuttings. It’s a small detail, but it makes all the difference.
Keep on rootin’, baby!
If you’d like to reach out to me privately, please use the contact form on this site.
Subscribe to receive blog updates by email.
Stay tuned, keep on rootin’ and happy growing!
Leave a Reply